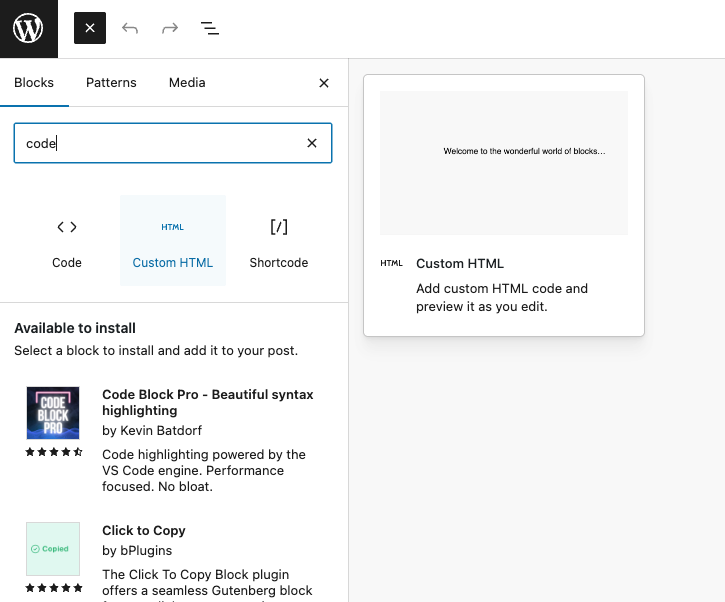
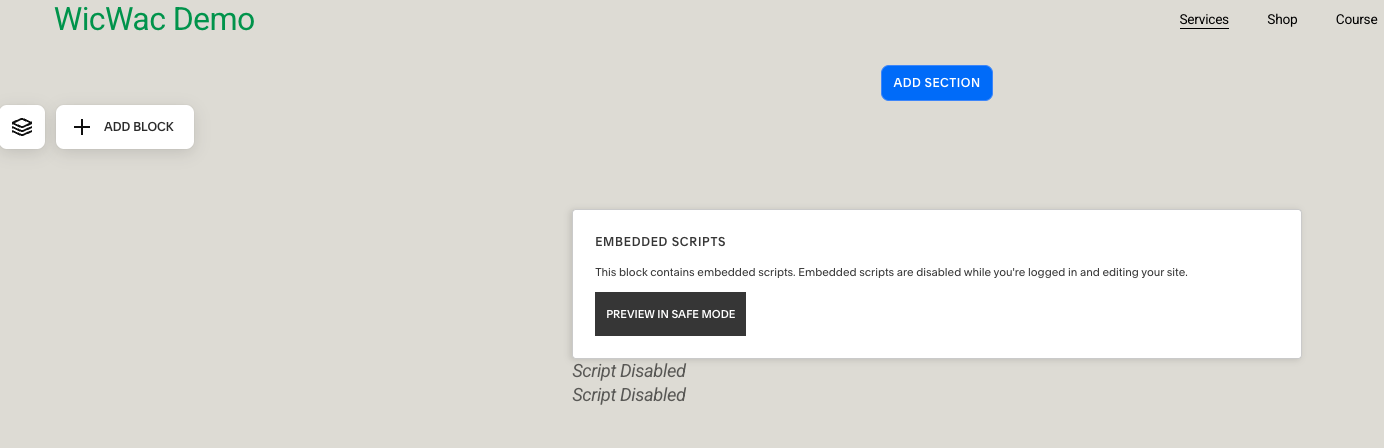
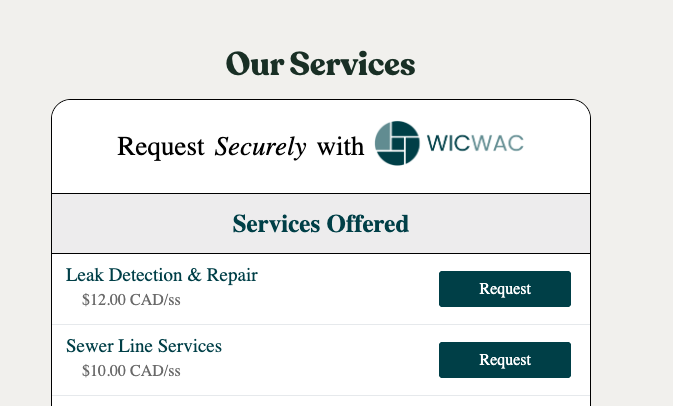
Conveniently Refer Service Providers and Connect with others in your community
Widget Integration
Live Preview
How to Use:
To integrate this widget into your website, follow these steps:
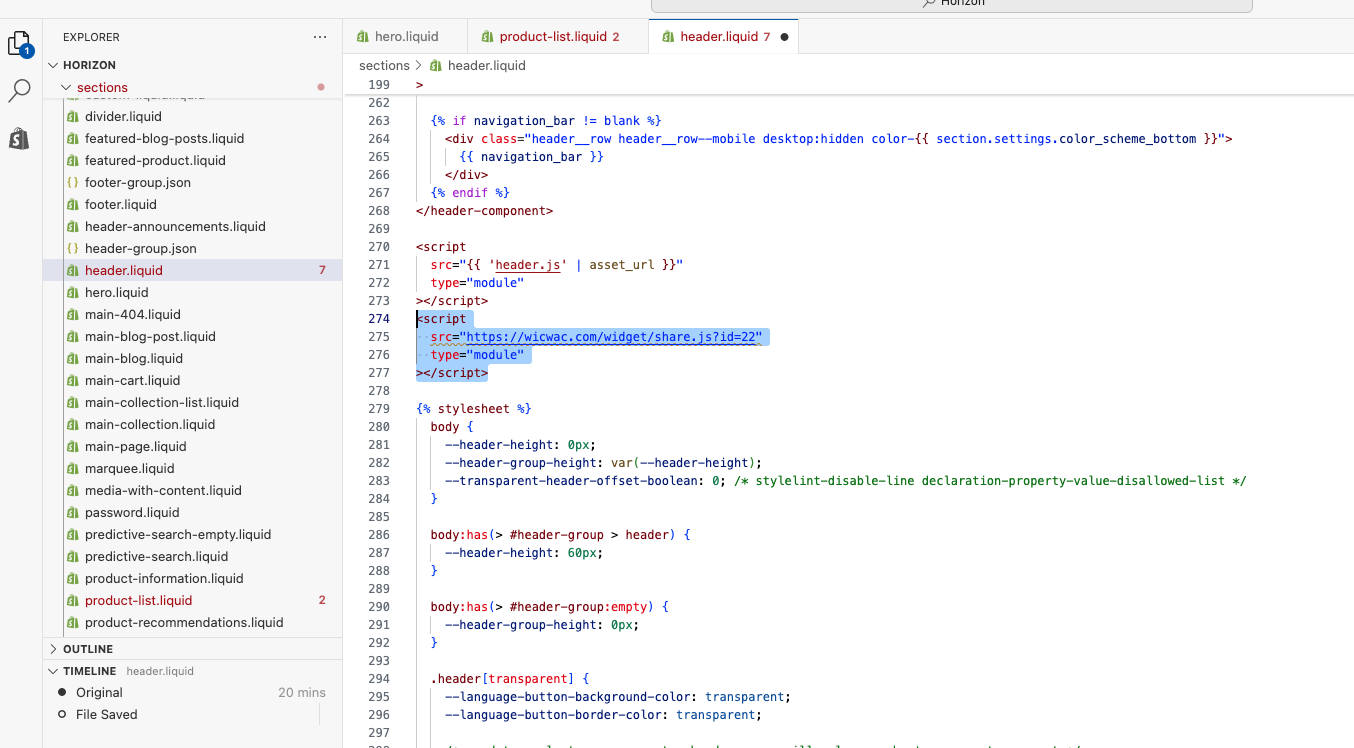
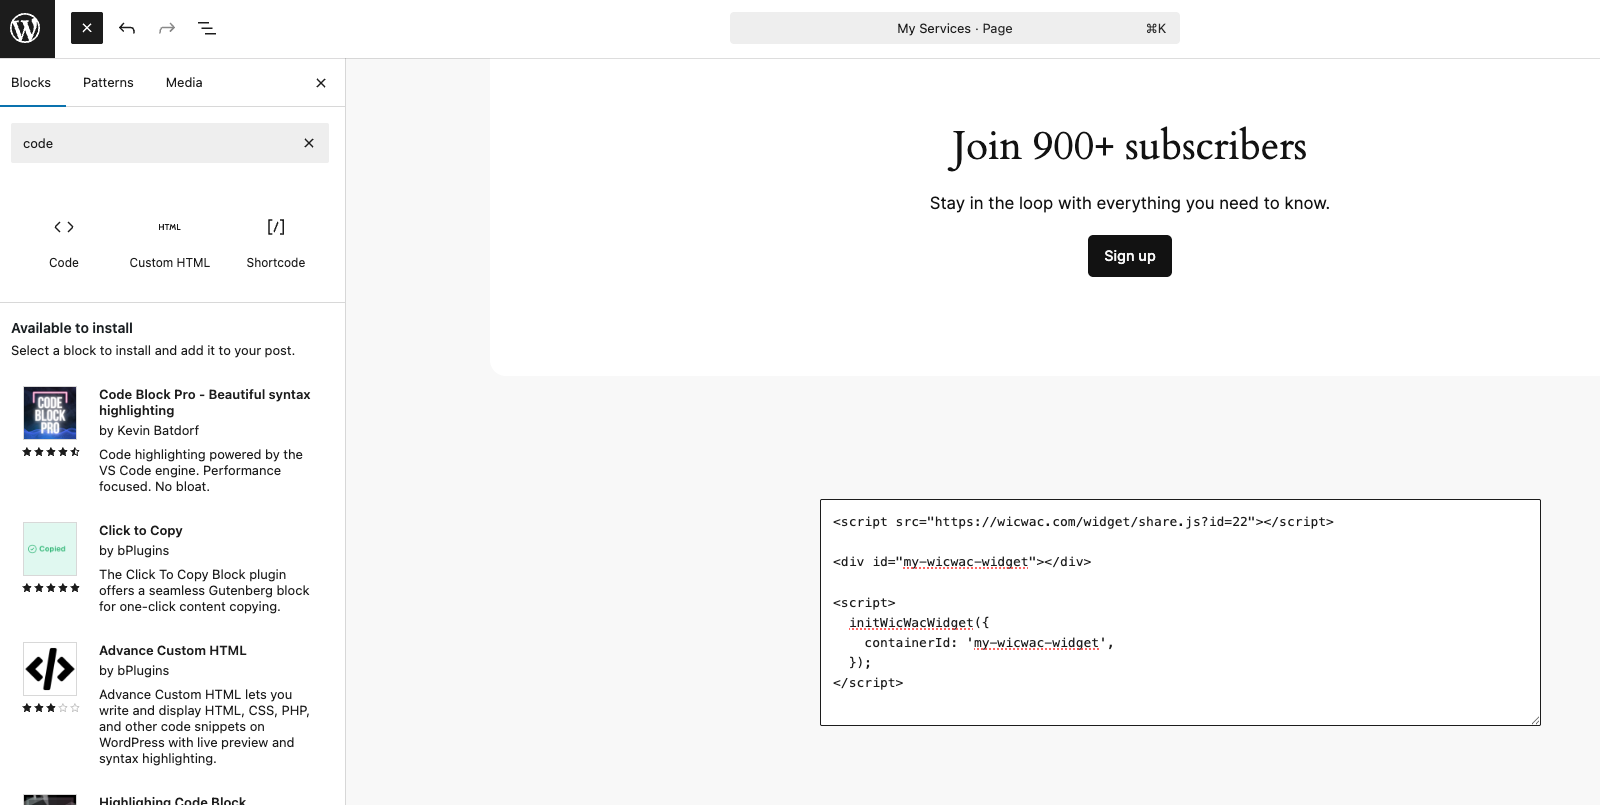
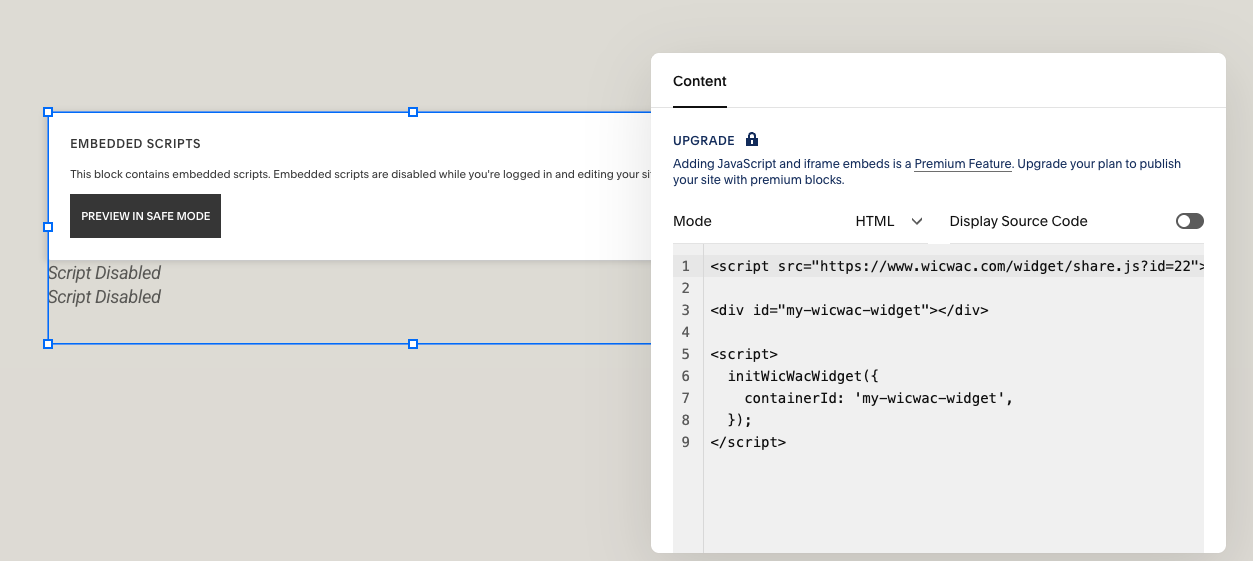
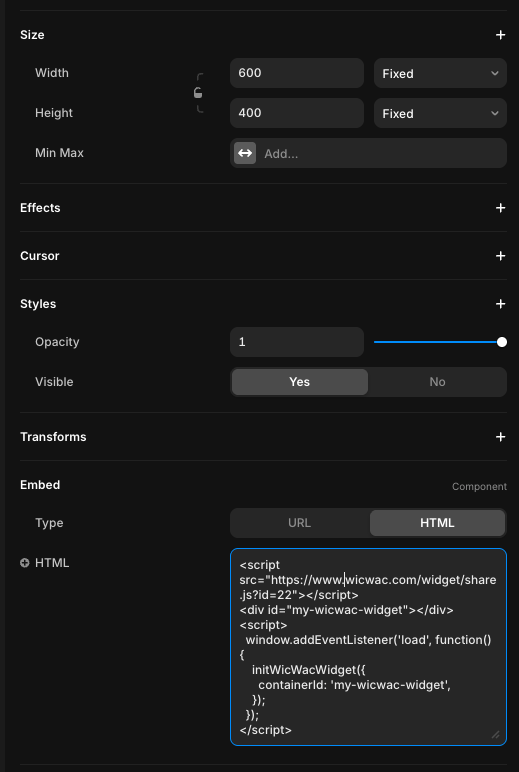
1. Add the script to your HTML header:
<script src="https://www.wicwac.com/widget/share.js?id=22"></script>
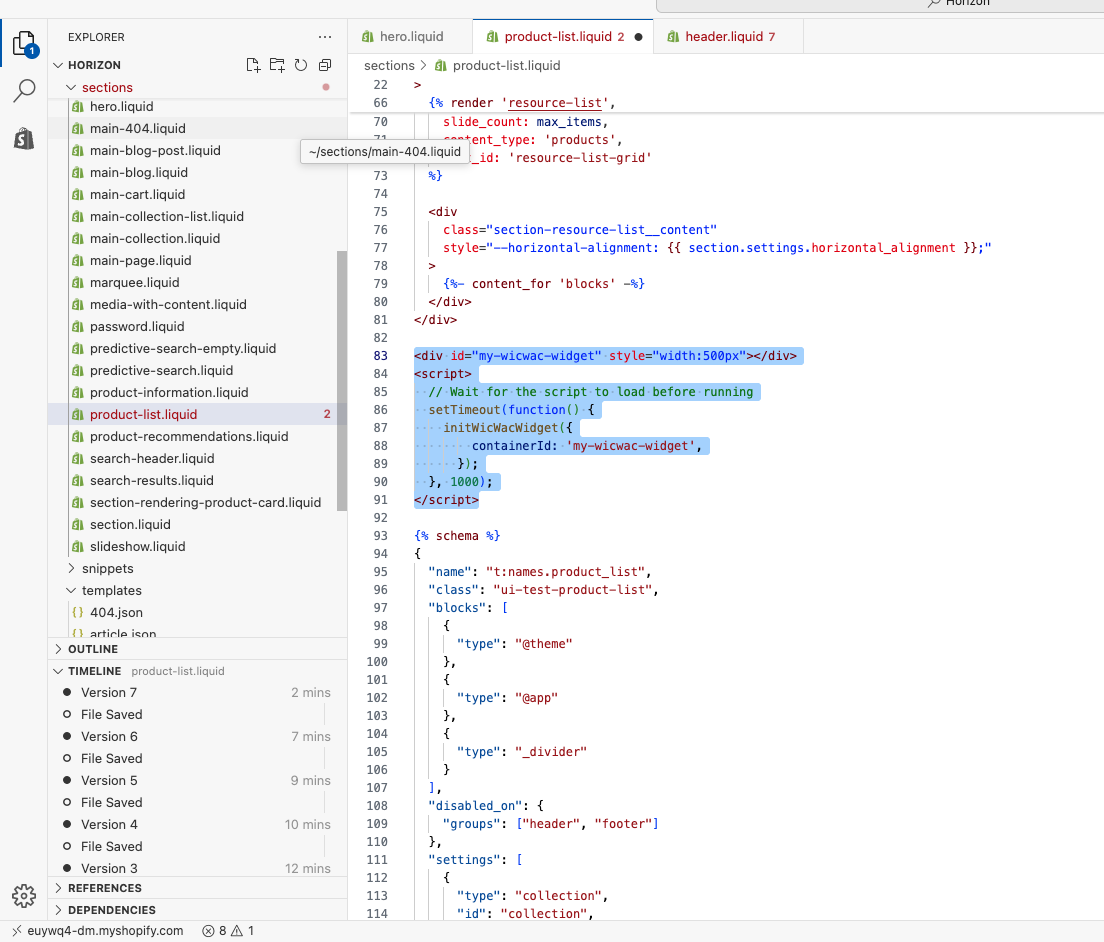
2. Add a container div where you want the widget to appear:
<div id="my-wicwac-widget"></div>
3. Initialize the widget:
<script>
initWicWacWidget({
containerId: 'my-wicwac-widget',
});
</script>
Widget Integration for Popular Platforms:
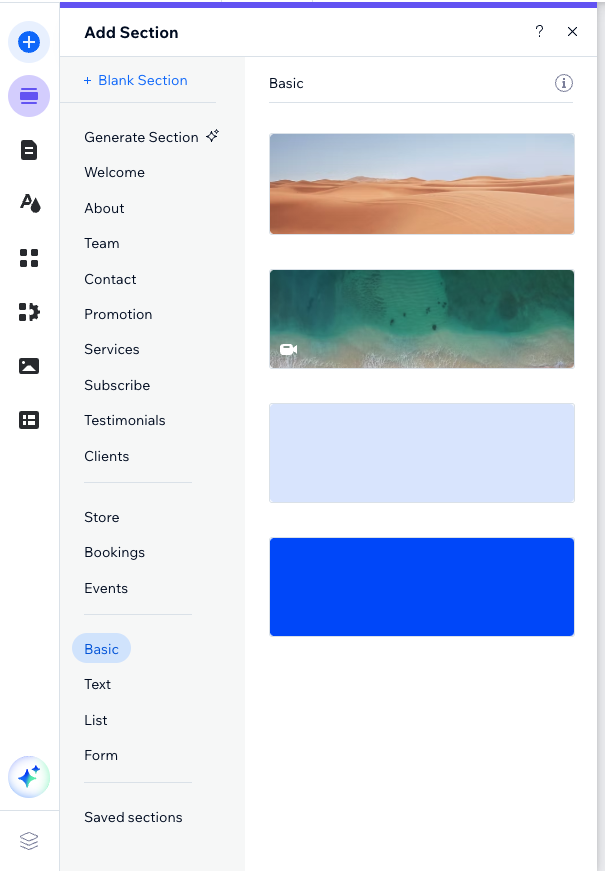
Wix Integration Step-By-Step Instructions
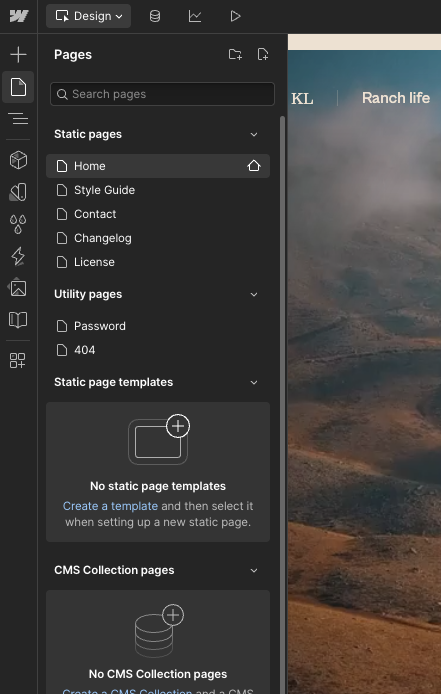
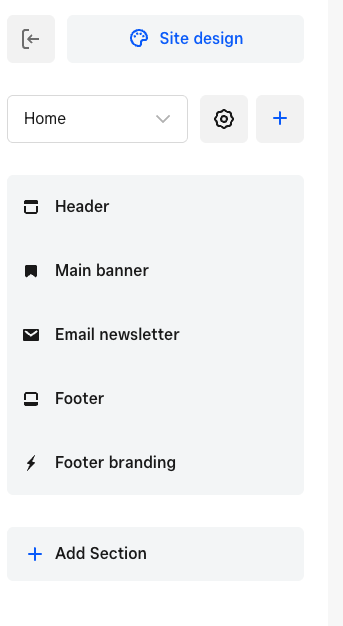
Step 1: Access Wix Editor
Log in to your Wix account and open your website in the Wix Editor.
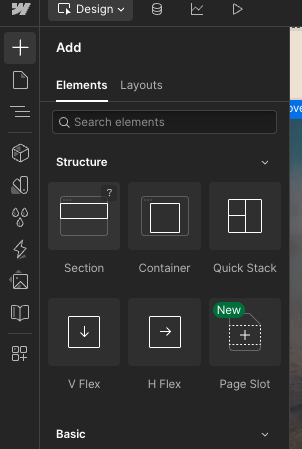
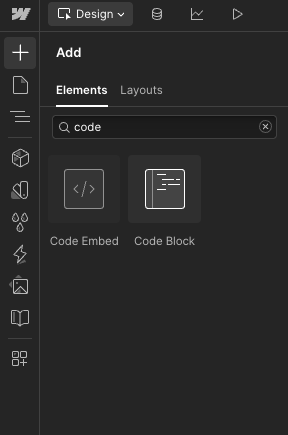
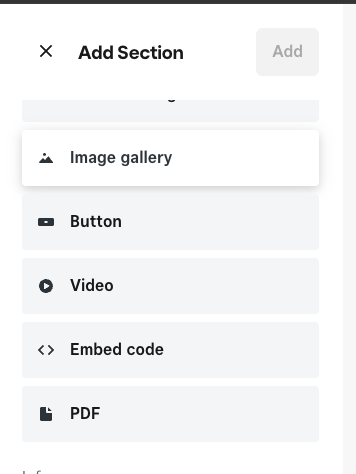
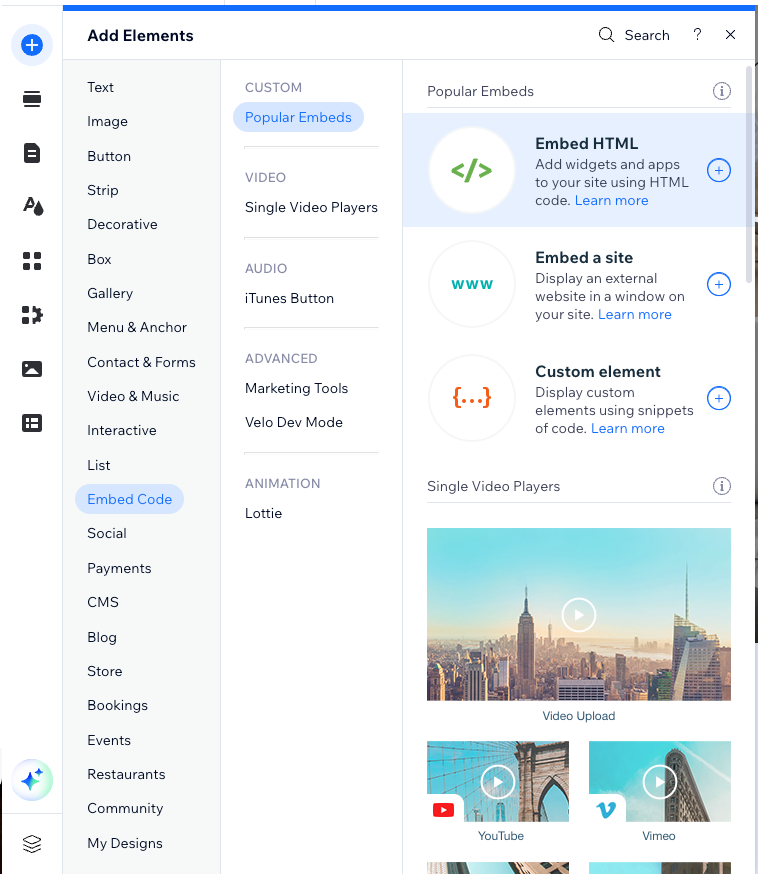
Step 2: Add Widget Code
Click the "+ Add Elements" button to open the elements panel, then scroll down and click on "Embed Code" under the "CUSTOM" category. Finally, select "Embed HTML" from the available embed options to add an HTML embed element to your page.
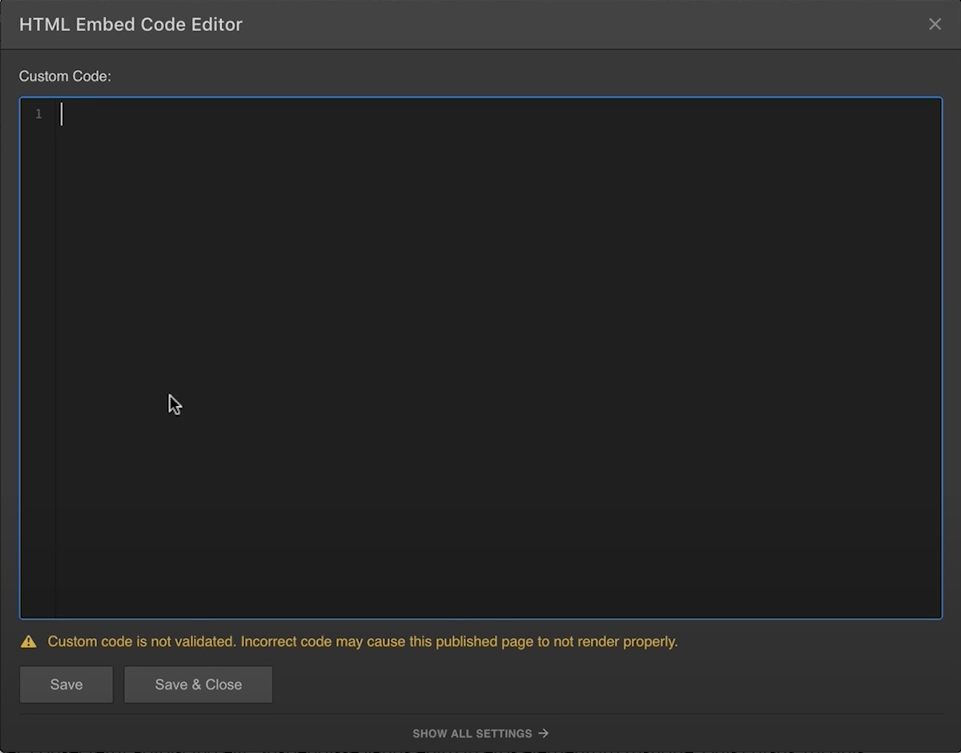
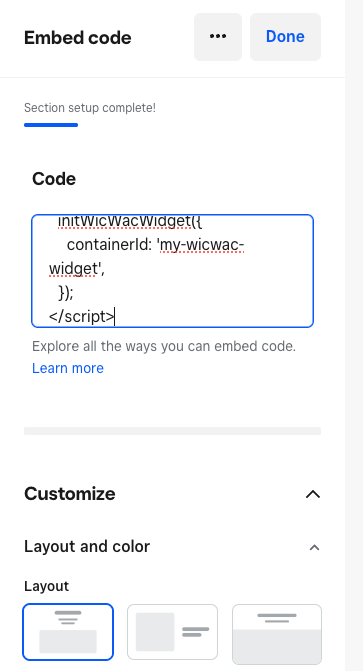
Step 3: Configure HTML Settings
<script
src="https://www.wicwac.com/widget/share.js?id=22"></script>
<div id="my-wicwac-widget"></div>
<script>
initWicWacWidget({
containerId: 'my-wicwac-widget',
});
</script>
Click on the HTML element you just added to open the HTML Settings panel. Select "Code" option and paste the integration code provided above into the text area.
Step 4: Update and Preview
Click the "Update" button to apply the changes. The widget should now appear on your page. You can resize and position it as needed.
Step 5: Publish Your Site
Once you're satisfied with the widget placement and appearance, click "Publish" to make the changes live on your website.
Shopify Integration Step-By-Step Instructions
Step 1: Access Shopify Admin
Log in to your Shopify Admin account.
Step 2: Edit Theme
Go to Online Store > Themes. Find the theme you're using and click Actions > Edit code or click Customize then select Edit code.
Step 3: Add Script to Header
In the file list, find and click on theme.liquid
(usually in the Layout folder). Find the
</head> tag and add this code right before
the </head> tag:
<script
src="https://www.wicwac.com/widget/share.js?id=22"
type="module"></script>
Step 4: Add Widget to Desired Location
Choose one of the following methods to add the widget code:
<div id="my-wicwac-widget"></div>
<script>
// Wait for the script to load
before running
setTimeout(function(){
initWicWacWidget({
containerId:
'my-wicwac-widget',
});
}, 1000);
</script>
Method 4a: Add to Product Page
Open the product.liquid or product-form.liquid file (in the Templates or Sections folder) and add to the location where you want to display the widget:
Method 4b: Add to Homepage
Open the index.liquid file and add similar code to the desired location.
Method 4c: Add to All Pages
Add directly to theme.liquid at the location you want.
Step 5: Save and Test
Click Save to save the changes and visit your website to check if the widget is displaying correctly.
WordPress Integration Step-By-Step Instructions
Step 1: Access WordPress Admin
Log in to your WordPress admin account to access the management dashboard.
Step 2: Navigate to Pages
In the left menu, select "Pages" to view the list of pages. Choose the page where you want to add the widget or create a new page by clicking "Add Page".
Step 3: Add HTML Block
In the Gutenberg editor, click the "+" button to add a new block. Search for "code" or "HTML" and select the "Custom HTML" block.
Step 4: Configure HTML Settings
In the Custom HTML block, paste your widget code into the editor. Make sure to select the "HTML" tab to enter the code.
<script
src="https://www.wicwac.com/widget/share.js?id=22"</script>
<div id="my-wicwac-widget"></div>
<script>
initWicWacWidget({
containerId:
'my-wicwac-widget',
});
</script>
Step 5: Save and Test
Click Save to save the changes and visit your website to check if the widget is displaying correctly.
Squarespace Integration Step-By-Step Instructions
Step 1: Login to Squarespace and Select Website
Log in to your Squarespace management portal and select the Website you want to edit from your dashboard.
Step 2: Select Page and Choose Page to Edit
Navigate to the "Pages" section in your Squarespace editor and select the page where you want to add the widget.
Step 3: Add Section (if needed)
If you need to add a new section to your page, click the "Add Section" button to create a new content area where you can place the widget.
Step 4: Add Block
Click the "Add Block" button to open the block selection menu where you can choose from various content types.
Step 5: Select Code Block
From the block selection menu, scroll down and choose the "Code" block option. This will allow you to embed custom HTML and JavaScript code into your page.
Step 6: Copy and Paste Integration Code
<script
src="https://www.wicwac.com/widget/share.js?id=22"</script>
<div id="my-wicwac-widget"></div>
<script>
initWicWacWidget({
containerId:
'my-wicwac-widget',
});
</script>
Copy the integration code provided above and paste it into the Code block. Make sure the code is properly formatted and contains all the necessary elements.
Step 7: Save, Exit and Preview
Click "Save" to save your changes, then "Exit" the editor. Use the "Preview" option to see how the widget appears on your live website before publishing.
Webflow Integration Step-By-Step Instructions
Step 1: Login to Webflow
Log in to your Webflow management portal and select the static page where you want to add the widget
Step 3: Add Section (if needed)
If you need to add a new section to your page, click the "Add Section" element to create a new content area where you can place the widget.
Step 4: Add Code Embed
Click the "Code Embed" element to add the widget integration code.
Step 4: Copy and Paste Integration Code
<script
src="https://www.wicwac.com/widget/share.js?id=22"</script>
<div id="my-wicwac-widget"></div>
<script>
initWicWacWidget({
containerId:
'my-wicwac-widget',
});
</script>
Copy the integration code provided above and paste it into the Code block. Make sure the code is properly formatted and contains all the necessary elements.
Step 7: Save, Exit and Publish
Click "Save" to save your changes, then "Exit" the editor. Use the "Publish" option to see how the widget appears on your live website before publishing.
Weebly Integration Step-By-Step Instructions
Step 1: Login to Weebly
Log in to your Weebly management portal, select "Website" and click "Edit Site" to access the editor.
Step 2: Select Page and Add Section
Choose the page where you want to integrate the widget, then click "Add Section" to create a new content area.
Step 3: Select Embed Code Section
From the section options, select the "Embed Code" section type to add custom code to your page.
Step 4: Paste Integration Code
Copy the integration code provided below and paste it into the "Code" field. Make sure the code is properly formatted and contains all the necessary elements.
<script
src="https://www.wicwac.com/widget/share.js?id=22"</script>
<div id="my-wicwac-widget"></div>
<script>
initWicWacWidget({
containerId:
'my-wicwac-widget',
});
</script>
Step 5: Preview Widget
The widget will appear in the section where you integrated the code. You can preview how it looks on your page before publishing.
Step 6: Save and Publish
Click "Done" to save your changes, then click "Publish" to make the widget live on your website.
Framer Integration Step-By-Step Instructions
Step 1: Login to Framer
Log in to your Framer management portal and click "Insert" to access the insert menu.
Step 2: Insert Section (if needed)
If you need to add a new section to your page, select "Insert Section" to create a new content area where you can place the widget.
Step 3: Insert Embed
Click "Insert Embed" to add a custom code embed element to your page.
Step 4: Paste Integration Code
Copy the integration code provided below and paste it into the "HTML" field. Make sure the code is properly formatted and contains all the necessary elements.
<script
src="https://www.wicwac.com/widget/share.js?id=22"</script>
<div id="my-wicwac-widget"></div>
<script>
initWicWacWidget({
containerId:
'my-wicwac-widget',
});
</script>
Notes to developers
This guide is for developers to get comfortable implementing the WicWac component / widget on their landing page or customer’s landing page.
Important: When implementing this widget on your landing page / customer’s page , you will need to set up a WicWac storefront for your customer / landing page. The widget and storefront work in tandem together.
This specific portal is intended to demonstrate the ease of customizing and implementing the widget. Most of WicWac’s features are disabled and can only be live when implemented with a live service provider account.
To activate the widget on your WicWac page you must contact WicWac support at support@wicwac.com or contact your account representative.
Once you’re ready to implement the widget on your customers landing page , please follow the following steps to Activate Your Service Provider Account on WicWac
To transform your landing page into a fully functional e-commerce site for services, follow these critical steps:
Log in to WicWac and click “Become a Service Provider”
Onboard your customer to the platform by completing the actions
During onboarding add your first service.
Additional services can be added and modified later via Business Setting.
Set clear availability times for your service to ensure customers know when to book.
Define both a visible area (where customers can see your service location) and a registered area (for businesses with a home-based setup). They can be the same.
Add your WicWac storefront to your business social media profiles, using the “Book Me” feature to drive engagement.
Select the plan that best fits your business needs.
Connect Stripe to accept payments directly on WicWac. Remember you’re always the merchant on record, not WicWac
